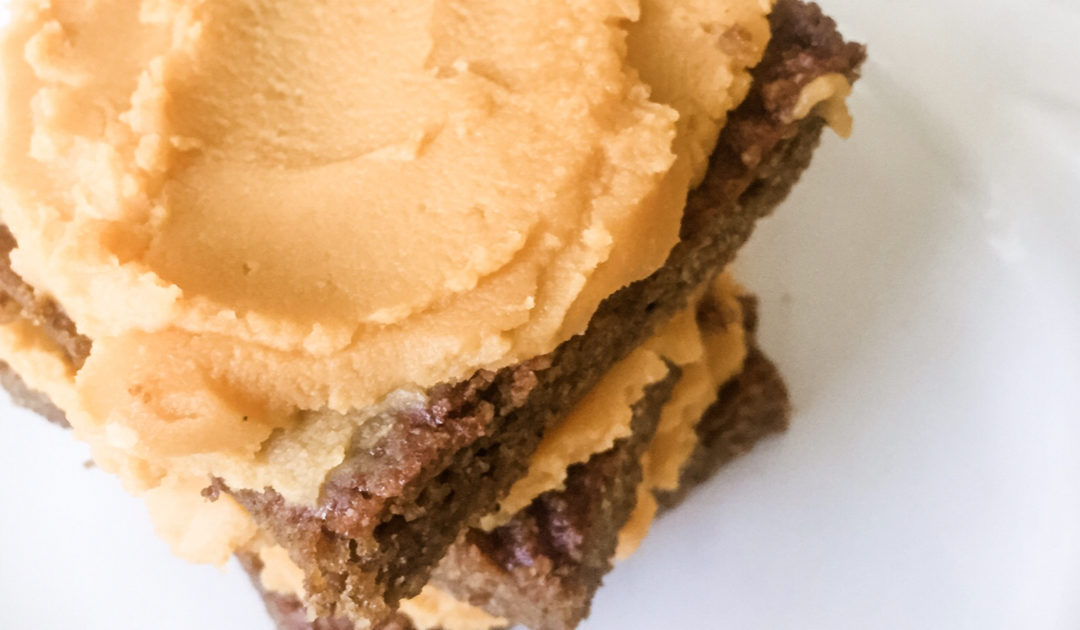
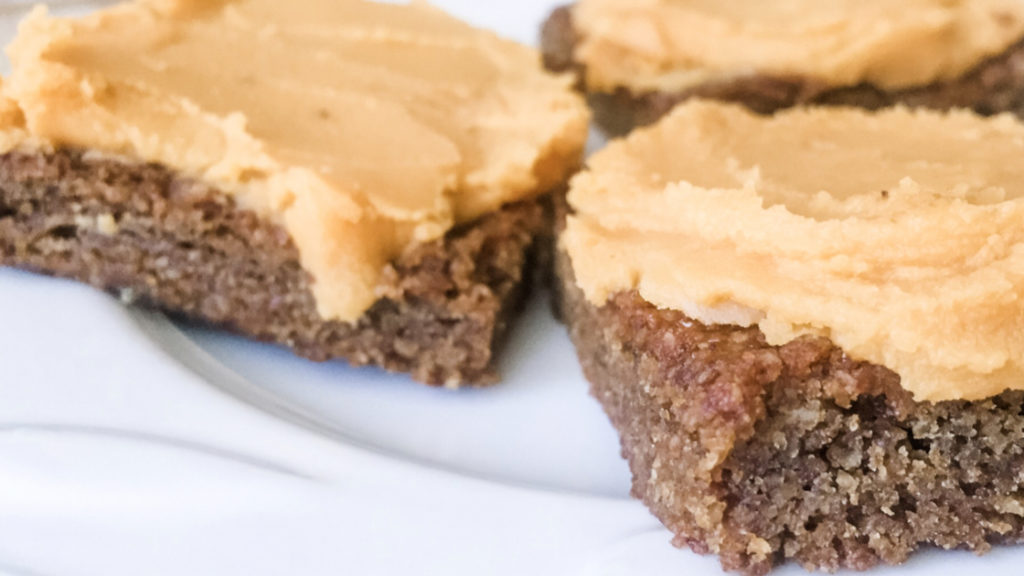
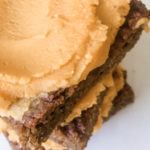
These gluten free vegan pumpkin bars with sweet potato frosting are made with almond flour for a delicious and healthy treat. The decadent vegan frosting adds a smoothness to the crumbly texture of the pumpkin bar. Naturally sweetened, incredibly moist and all around amazing!
HOW TO MAKE GLUTEN FREE PUMPKIN BARS
Gluten free and grain free baking can be challenging enough, but when you add in egg-free and dairy-free as well, it can become a little overwhelming for many people. I wanted to make this recipe something that those with multiple food restrictions could enjoy, and I think I finally succeeded in nailing it!
Finding a good egg substitute with making gluten free recipes depends on what flour substitute you are using. While flax and chia eggs work well most time, I have recently discovered that tapioca or arrowroot starch work best when using almond flour. If you aren’t used to using arrowroot starch, I really recommend getting some and giving it a try. It’s incredibly versatile and can be used in a lot of different ways.
I wouldn’t recommend making too many substitutions with this recipe. The texture is just right, and switching things up too much may not work too well.
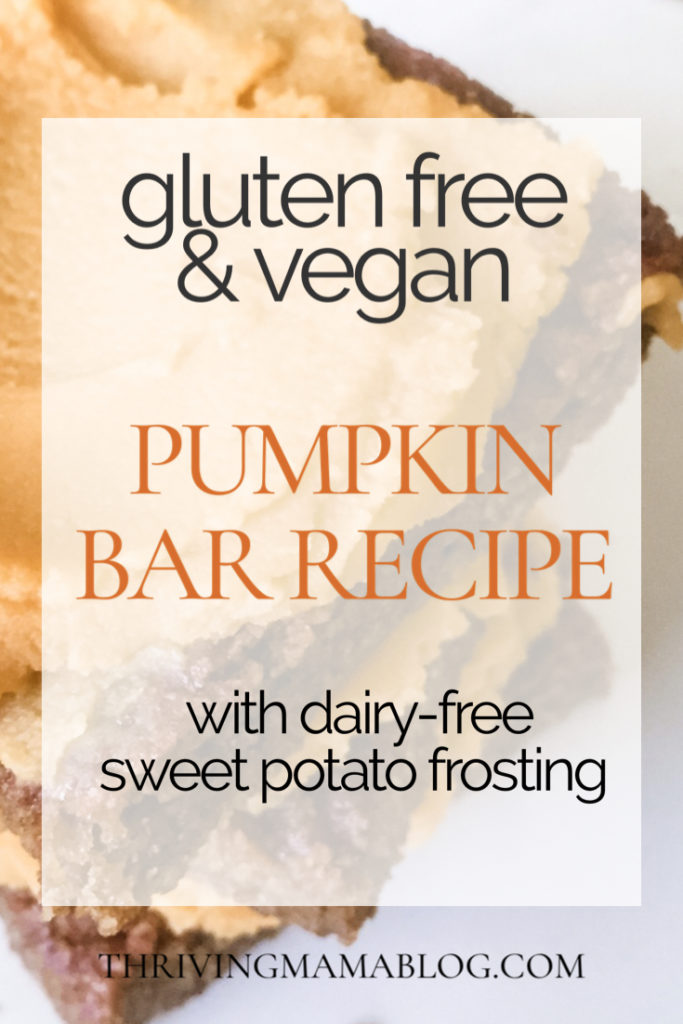
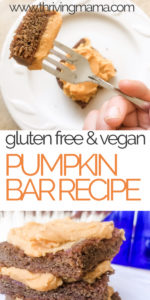
PIN GLUTEN FREE VEGAN PUMPKIN BARS WITH SWEET POTATO FROSTING
(This post contains referral links and Amazon affiliate links. I only recommend products I use and love! Read my full disclosure here)
IS CANNED PUMPKIN GLUTEN FREE?
Plain canned pumpkin is gluten free. There are also many canned pumpkin pie fillings that are also gluten free, but always be sure to read the ingredients. Fresh pumpkin puree is always best, if you have it available!
ARE PUMPKINS PALEO?
Sorry to burst your pumpkin, but pumpkin pie is not usually paleo. Unless, of course, you are making my PALEO PUMPKIN PIE RECIPE!
However, plain old pumpkin straight from the patch most definitely IS paleo and there is a huge variety of yummy pumpkin recipes you can make with it while on a paleo diet.
DON’T FORGET THE DAIRY FREE SWEET POTATO FROSTING!
This dairy free frosting is just too good to be true! Even my hubby liked it, which surprised me a bit as he can be a little picky about “replacements”.
Most vegan frosting recipes call for a lot of nuts or tofu, which can be an issue for those with nut and soy allergies. It’s sooooo creamy and reminiscent of cream cheese frosting. Not gonna lie, I sometimes keep some around just to eat by the spoonful!
The secret ingredient? Sweet potatoes!
Because this recipe doesn’t have powdered sugar, it’s silky smooth and a lot “lighter” in texture than a traditional frosting.
Simply sweetened with pure maple syrup, it gets it’s slight tangy flavor from a combination of fresh lemon juice and apple cider vinegar. This combo creates a flavor surprisingly like cream cheese frosting.
The only downside to this recipe (at least for this fly-by-the-seat-of-my-pants mama) is that you’ll need to plan ahead a bit. I recommend that you make this frosting the night before so that it can thicken in the fridge. It’s a little runny straight out of the blender, but it thickens up quite a bit more when chilled.
This recipe makes a little over 2 cups of frosting, and would nicely cover a sheet cake baked in a 9-inch by 13-inch pan. I used it over a 9-inch square pan with plenty of icing leftover. I hope you’ll love it as much as we do!
OTHER GLUTEN FREE PUMPKIN RECIPES…
Gluten Free Paleo Pumpkin Pie Recipe
I made this delicious Paleo Pumpkin Pie last week. It was a hit with my kids!
These gluten free vegan pumpkin bars with sweet potato frosting are made with almond flour for a delicious and healthy treat. The decadent vegan frosting adds a smoothness to the crumbly texture of the pumpkin bar. Naturally sweetened, incredibly moist and all around amazing!
Serving size: 12 bars
Prep Time: 10 minutes
Cook Time: 25 minutes
Total Time: 45 minutes
INGREDIENTS
FOR THE GRAIN FREE PUMPKIN BARS
2 cups blanched almond flour
1/4 cup arrowroot powder
3/4 cup coconut sugar
1/2 teaspoon baking soda
2 1/2 teaspoons pumpkin pie spice
1/4 teaspoon salt
1/2 cup pumpkin puree
2 tablespoons melted coconut oil
FOR THE VEGAN SWEET POTATO FROSTING
1 large sweet potato
1/2 cup maple syrup
6 tablespoons coconut oil, melted
2 tablespoons water
1 teaspoon fresh lemon juice
1 teaspoon apple cider vinegar
1/8 teaspoon salt
INSTRUCTIONS
FOR THE GRAIN FREE PUMPKIN BARS
Preheat the oven to 350ºF Grease 9-inch square baking dish and set aside.
In a mixing bowl, whisk together the almond flour, arrowroot, coconut sugar, baking soda, pumpkin pie spice and salt.
Add the pumpkin and melted coconut oil and stir until well mixed. The batter will be moist and thick.
Transfer the batter to the oiled pan and use the back of a spoon or a spatula to spread it evenly into the pan. Bake about 35 minutes, until the top feels firm to the touch.
Let the bars completely cool before cutting, as they are crumbly when warm. After cooled completely, slice and serve as is, or top them with the sweet potato frosting or other topping of choice.
FOR THE VEGAN SWEET POTATO FROSTING
Peel the sweet potato and cut into chunks. Boil or steam the potato chunks until soft, about 10-15 minutes.
Mash the boiled potato into a 1 cup measuring cup and mash down to tightly pack. Save any remaining sweet potato for another use.
, maple syrup, coconut oil, water, lemon juice, apple cider vinegar and salt to a blender. Blend until silky smooth.
If it isn’t blending well, add more water 1 tablespoon at a time until smooth. Be sure not to add too much water or it will become too runny. Store the frosting in an airtight container in the fridge until cool.
Frosting will thicken as it cools. Keep it refrigerated for best texture, though it can be out at room temp for an hour or two for serving. Keeps up to a week when stored in the fridge.
Recipe Notes:
Use a granulated sweetener, as a liquid like maple syrup or honey will make the bars too moist.
If you like coconut oil, you can reduce the amount in the frosting to 4 tablespoons and increase the water by 2 tablespoons for a slightly runnier frosting.
You can also use white or purple sweet potatoes for different colored frostings!
You may replace the maple syrup with honey, but may need to use slightly less, as honey is a little sweeter.
Share in the comments if you made this recipe, and any changes you made! I’d love to hear how it was!
These gluten free vegan pumpkin bars with sweet potato frosting are made with almond flour for a delicious and healthy treat. The decadent vegan frosting adds a smoothness to the crumbly texture of the pumpkin bar. Naturally sweetened, incredibly moist and all around amazing!
Prep Time10mins
Cook Time25mins
Total Time45mins
Servings: 12bars
Ingredients
FOR THE GRAIN FREE PUMPKIN BARS
2cupsblanched almond flour
1/4 cuparrowroot powder
3/4cupcoconut sugar
1/2teaspoonbaking soda
2 1/2teaspoonspumpkin pie spice
1/4teaspoonsalt
1/2 cuppumpkin puree
2tablespoonscoconut oilmelted
FOR THE VEGAN SWEET POTATO FROSTING
1largesweet potato
1/2cupmaple syrup
6tablespoonscoconut oil
melted
2tablespoonwater
1teaspoonfresh lemon juice
1teaspoonapple cider vinegar
1/4teaspoonsalt
Instructions
FOR THE GRAIN FREE PUMPKIN BARS
Preheat the oven to 350ºF
Grease 9-inch square baking dish and set aside.In a mixing bowl, whisk together the almond flour, arrowroot, coconut sugar, baking soda, pumpkin pie spice and salt.
Add the pumpkin and melted coconut oil and stir until well mixed. The batter will be moist and thick.
Transfer the batter to the oiled pan and use the back of a spoon or a spatula to spread it evenly into the pan. Bake about 35 minutes, until the top feels firm to the touch.
Let the bars completely cool before cutting, as they are crumbly when warm. After cooled completely, slice and serve as is, or top them with the sweet potato frosting or other topping of choice.
FOR THE VEGAN SWEET POTATO FROSTING
Peel the sweet potato and cut into chunks. Boil or steam the potato chunks until soft, about 10-15 minutes.
Mash the boiled potato into a 1 cup measuring cup and mash down to tightly pack. Save any remaining sweet potato for another use., maple syrup, coconut oil, water, lemon juice, apple cider vinegar and salt to a blender. Blend until silky smooth..
If it isn't blending well, add more water 1 tablespoon at a time until smooth. Be sure not to add too much water or it will become too runny. Store the frosting in an airtight container in the fridge until cool.
Frosting will thicken as it cools. Keep it refrigerated for best texture, though it can be out at room temp for an hour or two for serving. Keeps up to a week when stored in the fridge
Notes
Use a granulated sweetener, as a liquid like maple syrup or honey will make the bars too moist.
If you like coconut oil, you can reduce the amount in the frosting to 4 tablespoons and increase the water by 2 tablespoons for a slightly runnier frosting.
You can also use white or purple sweet potatoes for different colored frostings!
You may replace the maple syrup with honey, but may need to use slightly less, as honey is a little sweeter.
Share in the comments if you made this recipe, and any changes you made! I'd love to hear how it was!
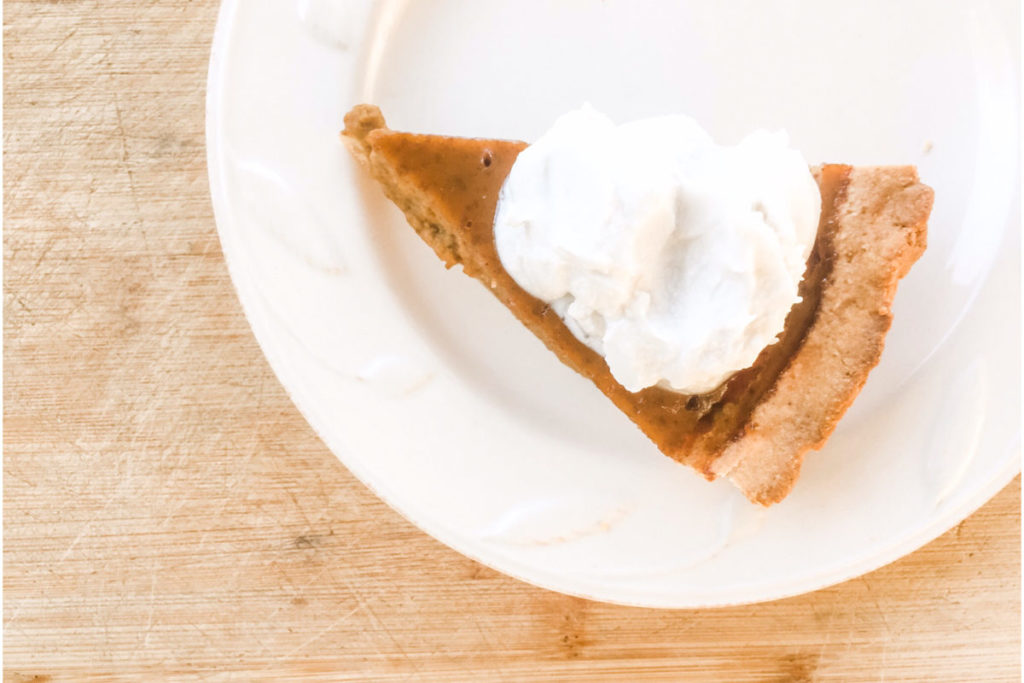
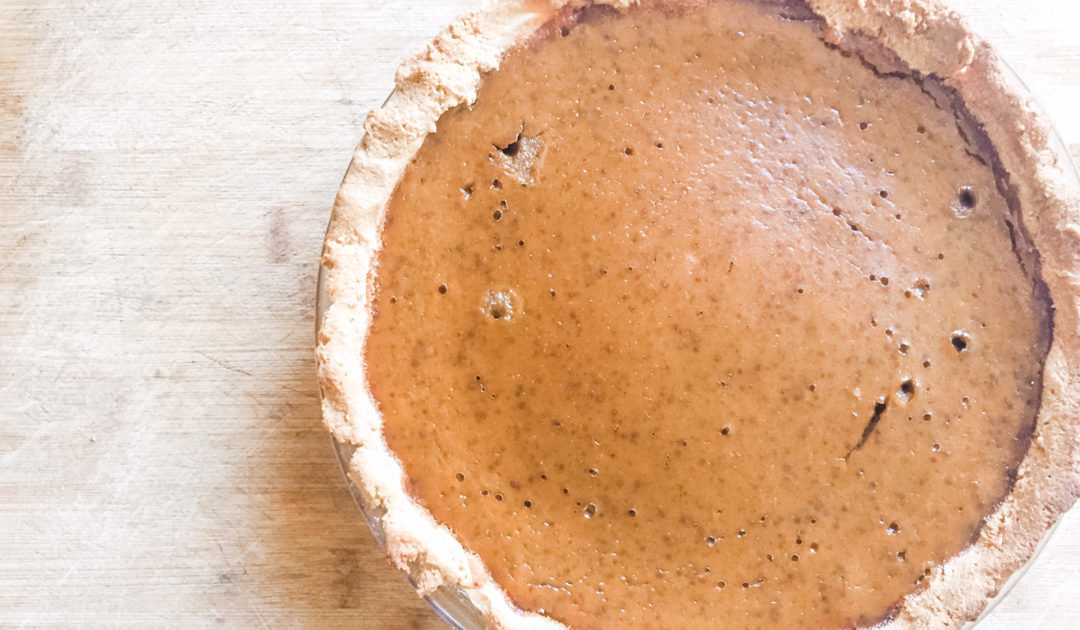
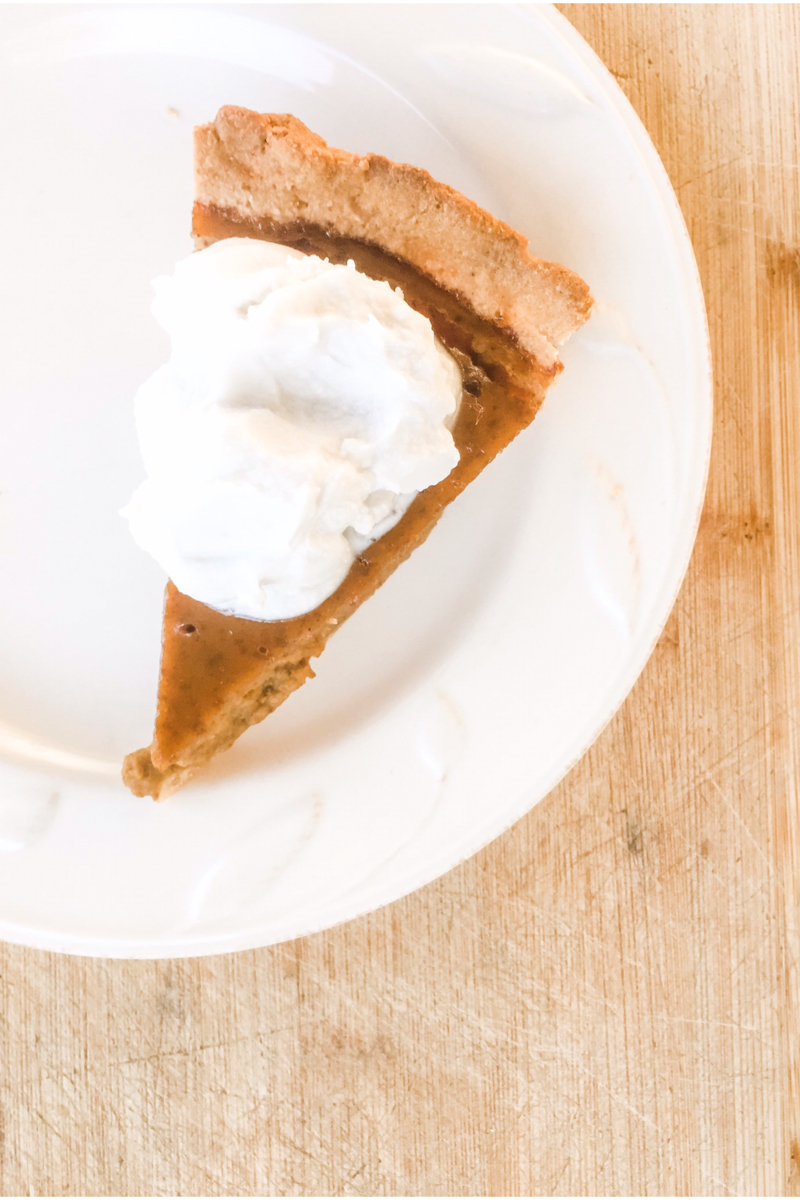
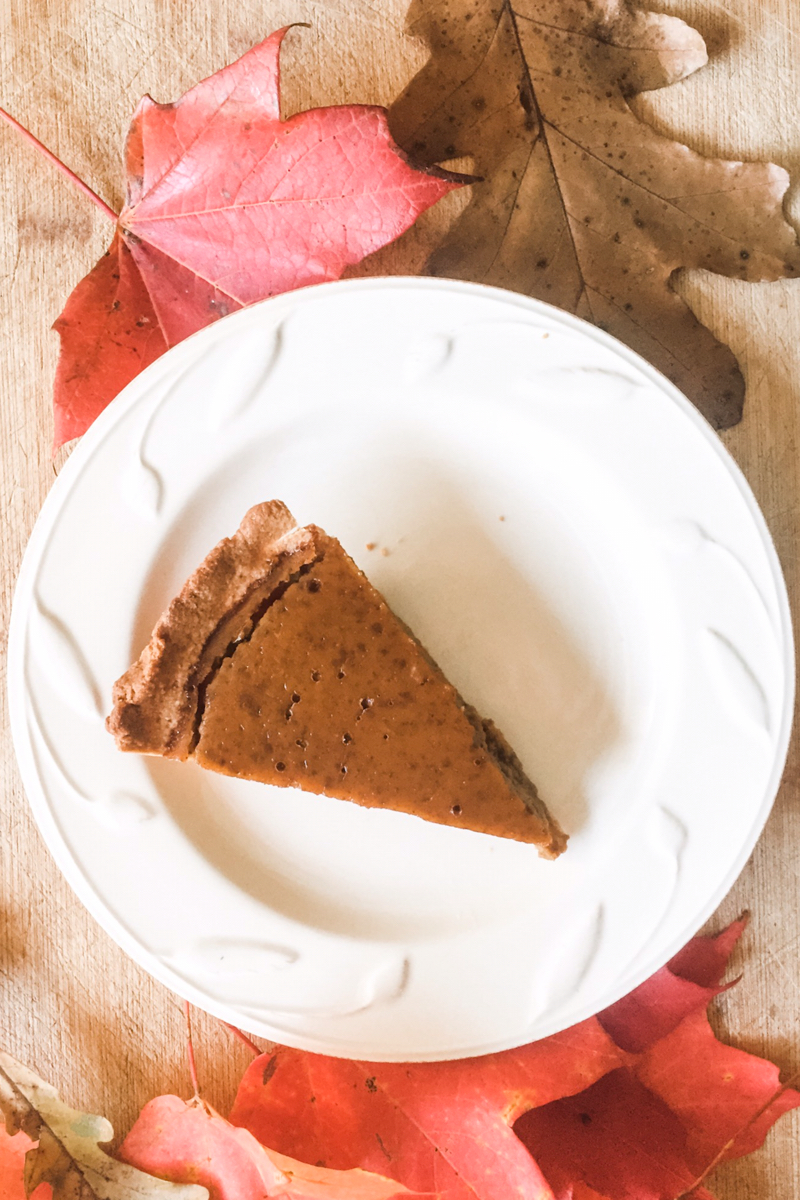
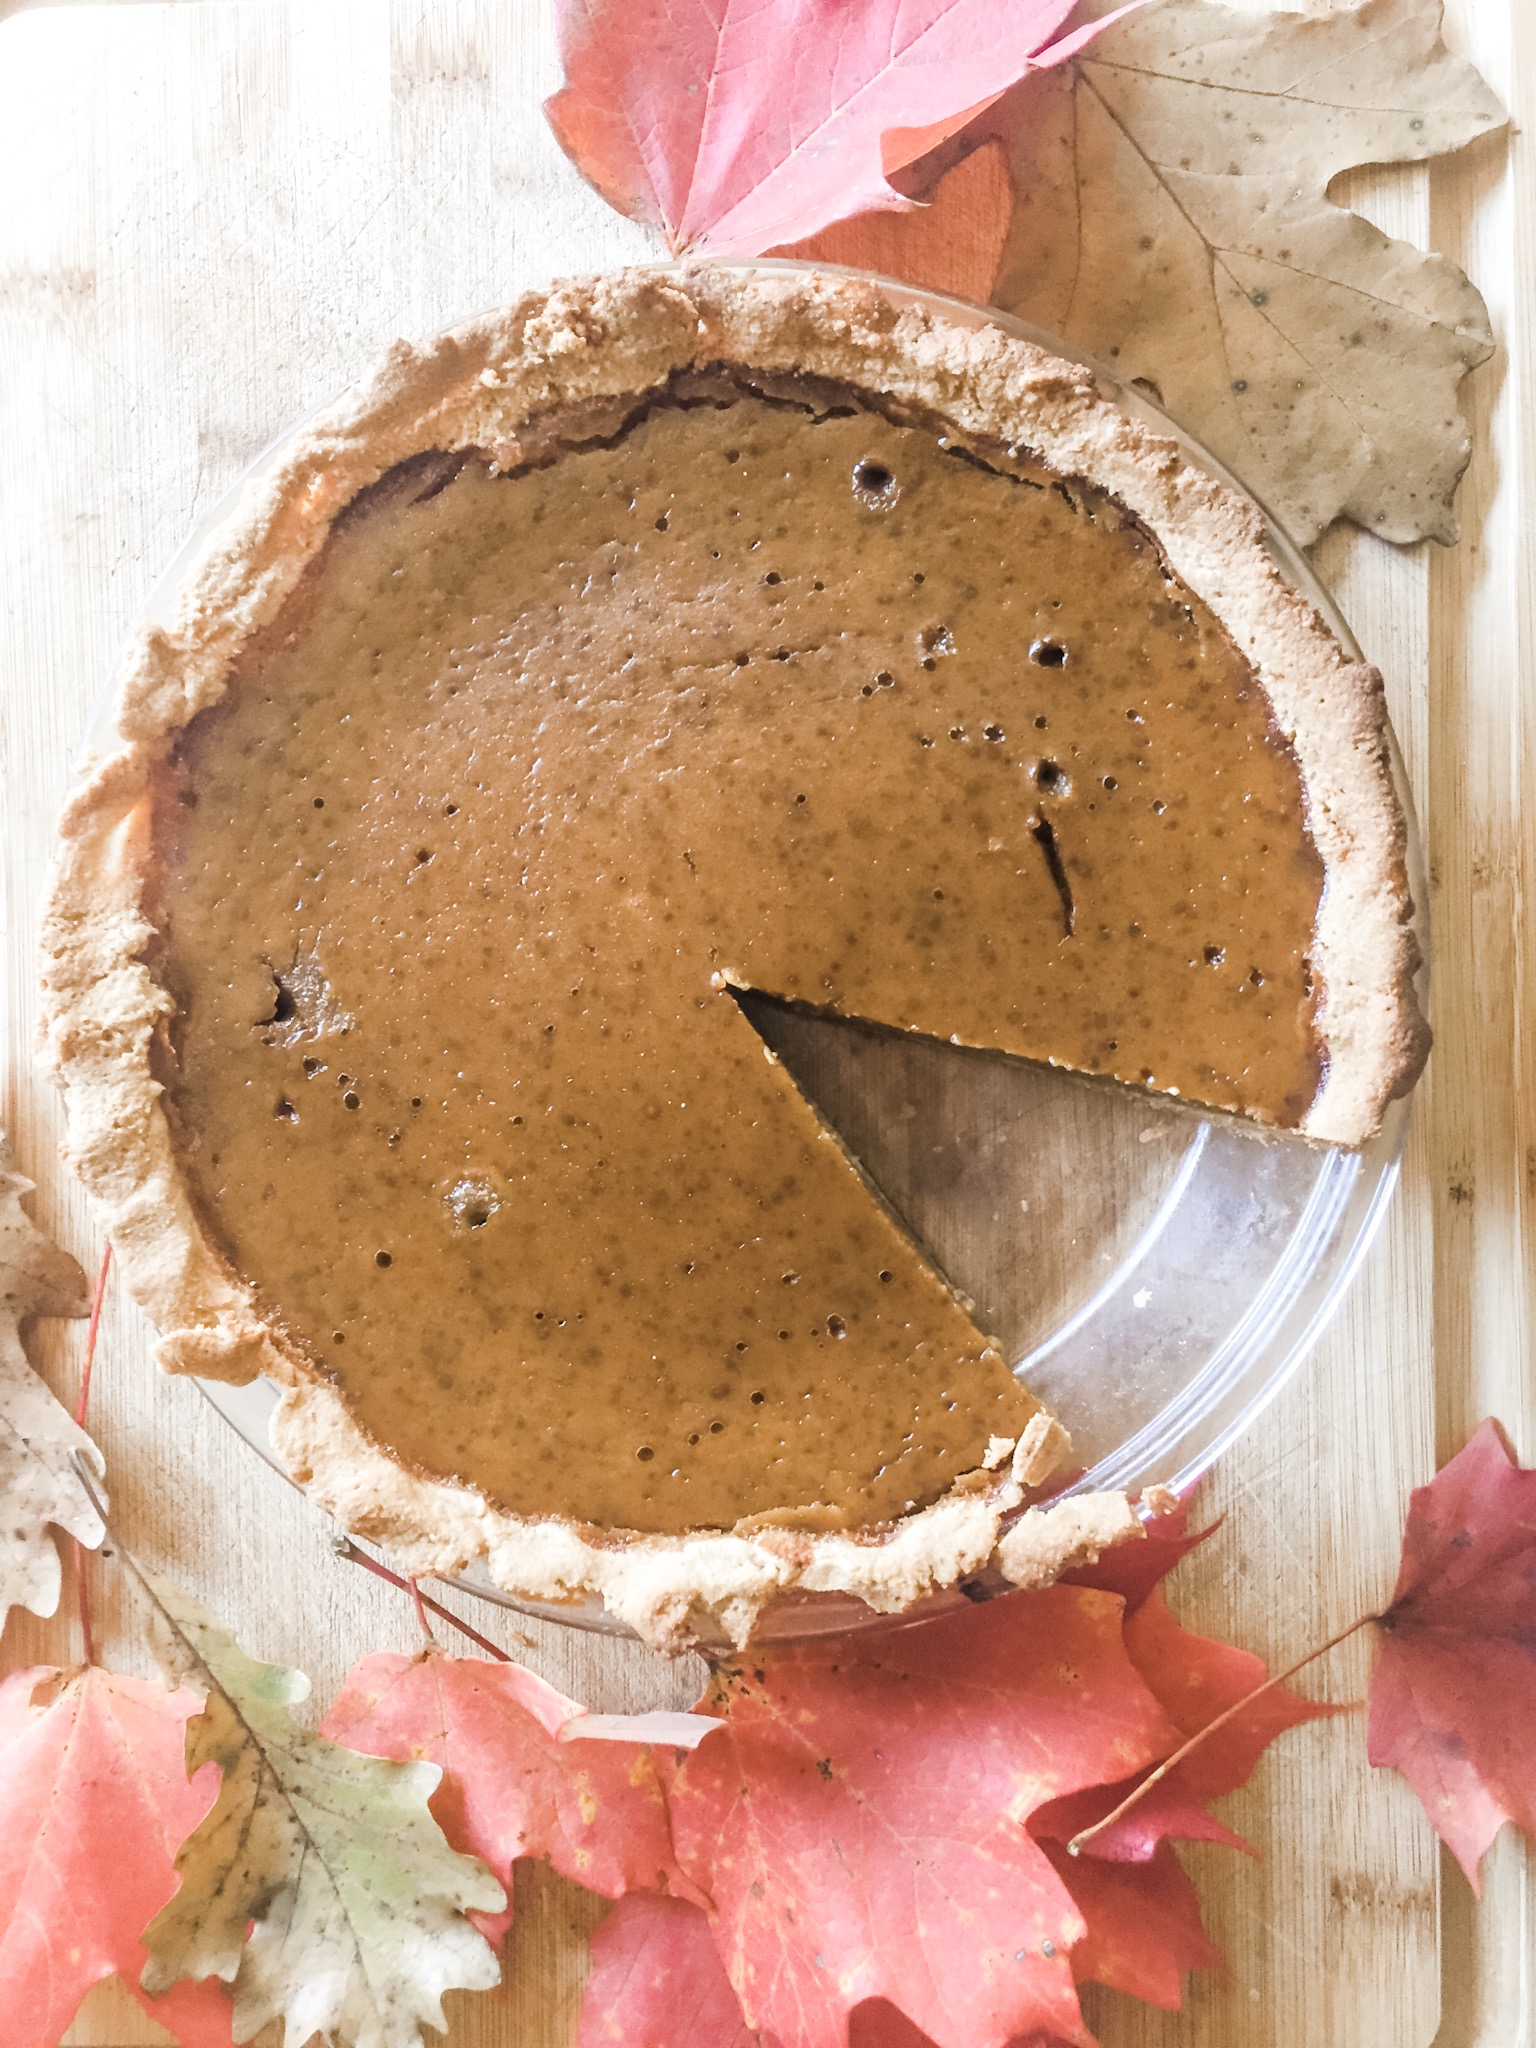
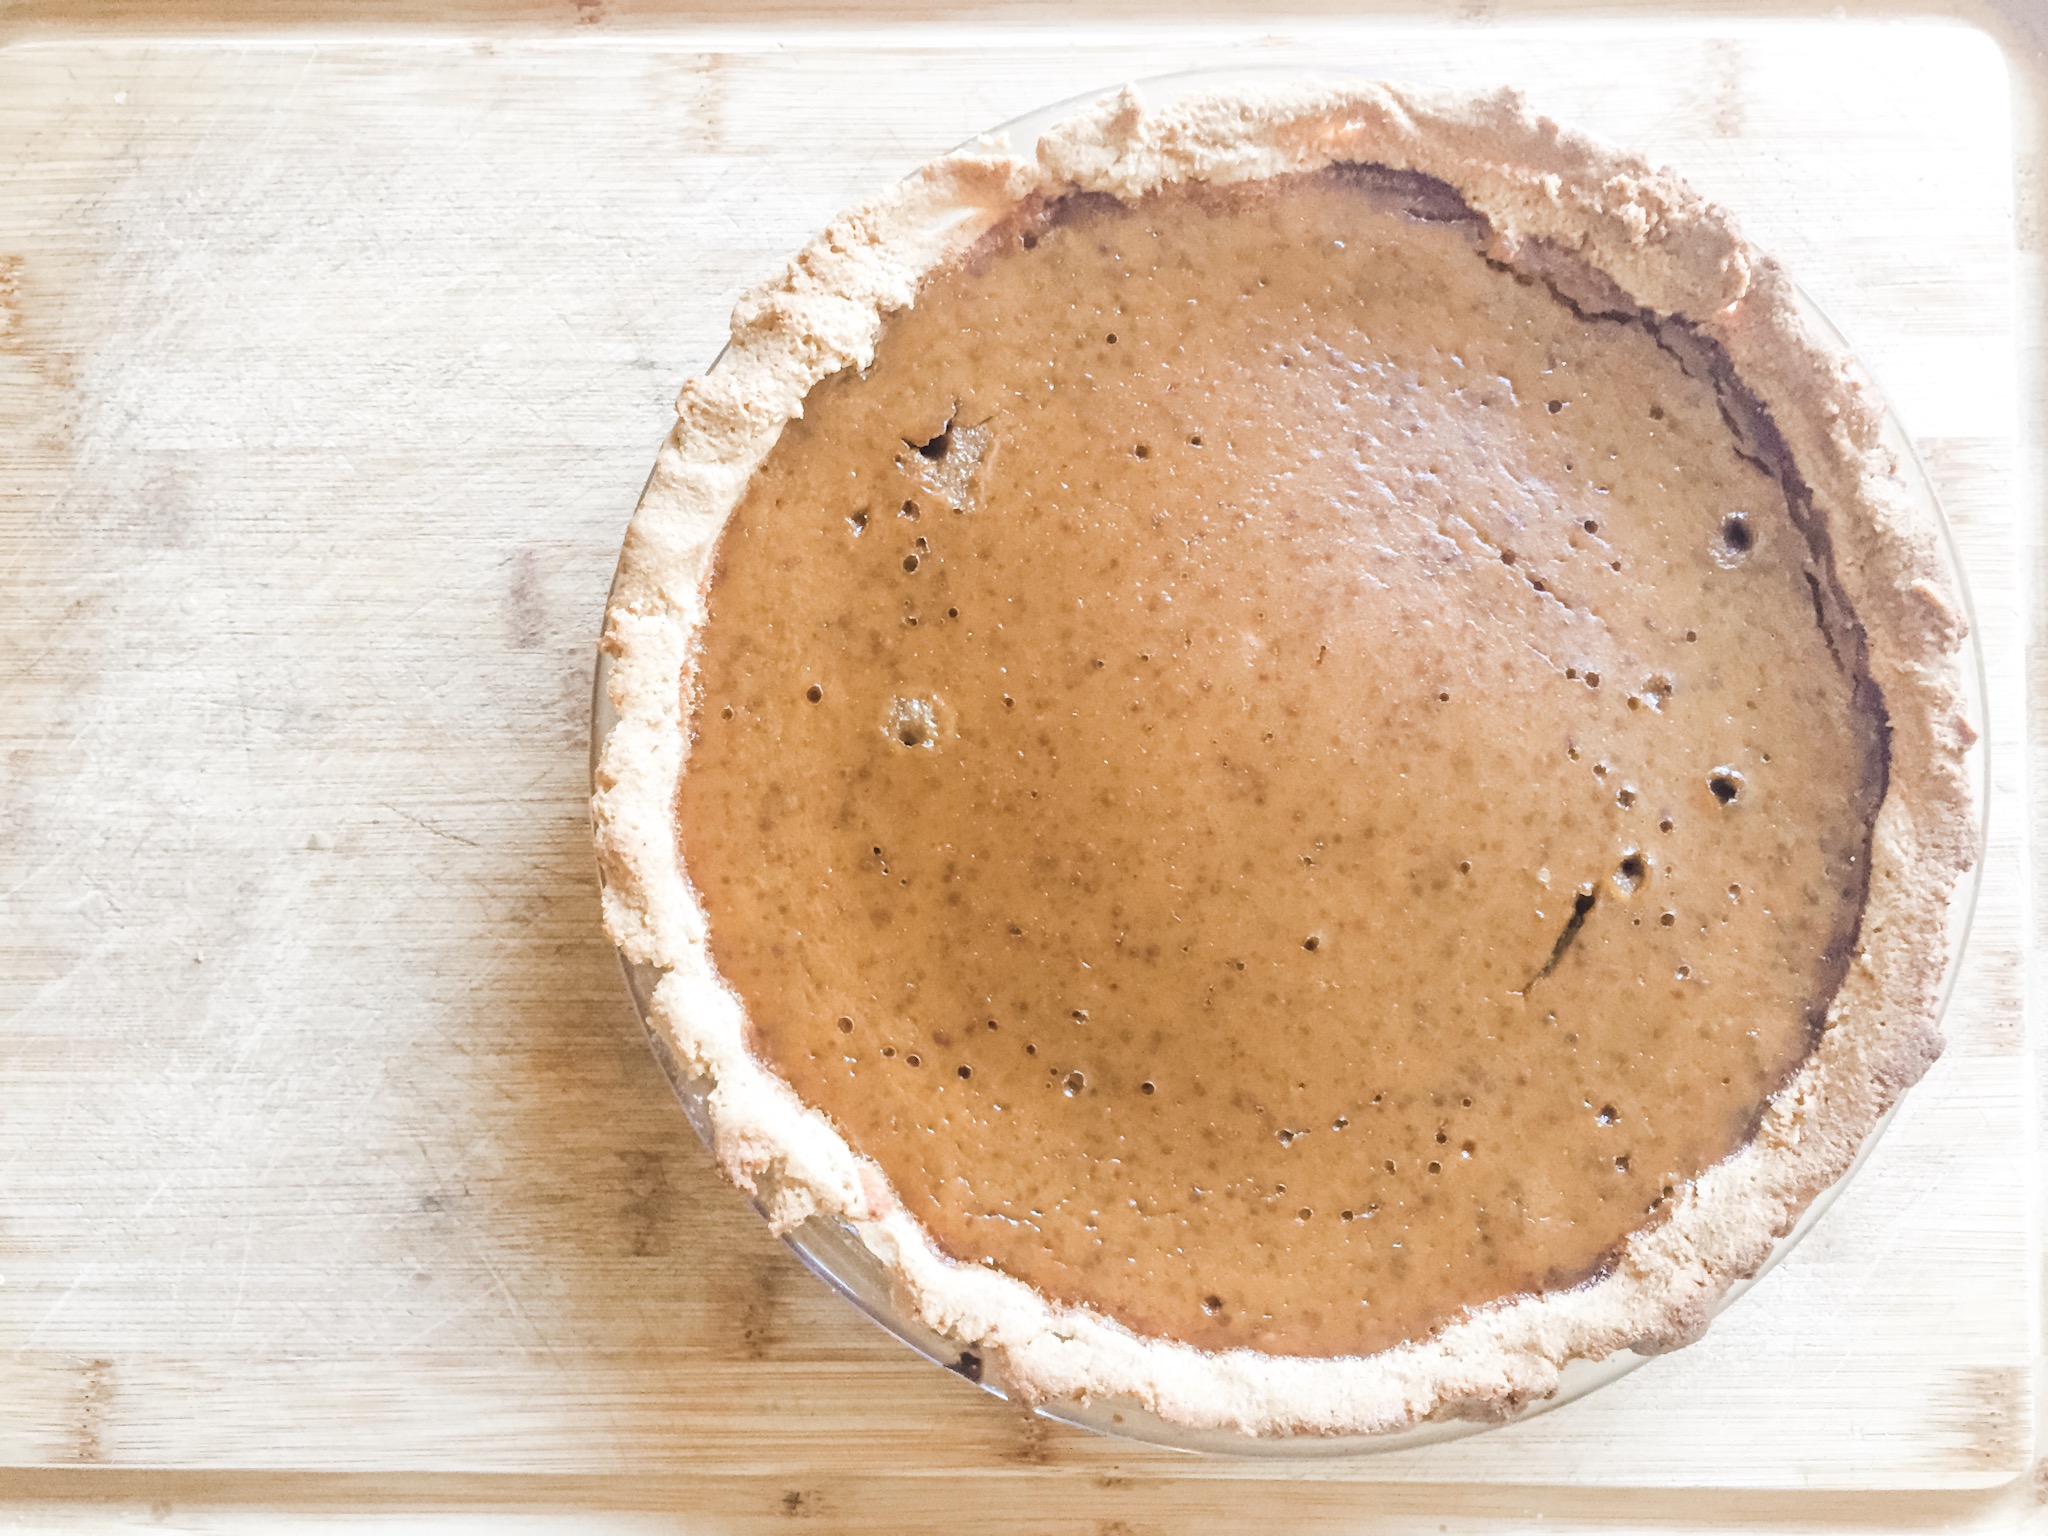
The Holidays are upon us and it’s time for pie! This easy Paleo Pumpkin Pie is not only Paleo approved but dairy free, gluten free, sugar free and delicious! Learn how to make this healthy pumpkin pie and you’ll see how simple eating by healthy for the holidays can be!
The holidays just wouldn’t be the same without pumpkin pie! My husbands birthday always fall the day before or after Thanksgiving, and since his favorite dessert is pumpkin pie, tradition dictates that we get a double dosage of this delectable dessert! This year, I’m experimenting with a few different healthy pumpkin pie variations, so that we can enjoy the season without feeling icky.
Since pumpkin pie is literally made almost entirely with a *gasp* VEGETABLE, making a healthier variation of it isn’t that hard to do. This pie is seriously healthy enough that I will let me kids eat it for breakfast.
Bonus mom points!
PIN PALEO PUMPKIN PIE FOR LATER
(This post contains referral links and Amazon affiliate links. I only recommend products I use and love! Read my full disclosure here)
HOW TO MAKE A SIMPLE HEALTHY PUMPKIN PIE
It’s easy to make a healthier version of a homemade pumpkin pie simply by following the recipe on the back of the can and swapping out the ingredients for healthier variations. This is usually the route I go when I am making a pie to take to and event or a family party where I know most people wouldn’t fully appreciate my “health nut” tendencies.
How to Eat Organic on a Budget FREE Ebook
Print off the CLEAN 15 AND DIRTY DOZEN SHOPPING GUIDE so that you always know what to buy from the organic produce section!
You have Successfully Subscribed!
For example, where it calls for sugar, you can use coconut sugar, sucanat or pure maple syrup. In place of evaporated milk, you can use organic coconut milk, or if you’re ok with dairy, fresh whole milk. With a little experimenting and tweaking, it’s fairly easy to make a healthier pie that tastes like the classic variation and that even the most discerning (ah-hmm, picky) guest will enjoy.
However, when I’m baking just for my little family, I like to make a version like this paleo pumpkin pie recipe, so that I can let my kids eat it in abundance without feeling guilty about it.
HONEST DISCLAIMER: This recipe is a little denser, with a slightly different texture and flavor than your run-of-the-mill super market pie. Someone who is used to overly sweet and processed pies may not fully appreciate it, but it’s delicious in it’s own right! We gobbled it up in one sitting!
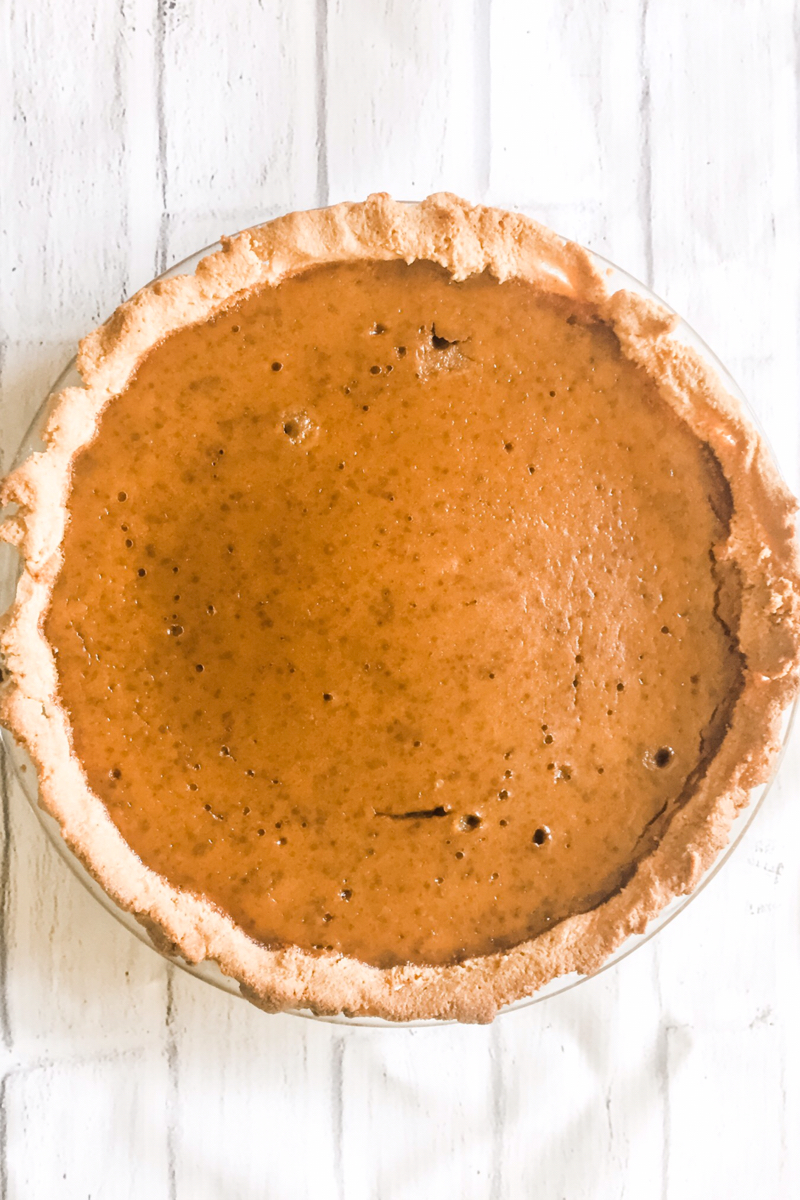
GLUTEN-FREE PUMPKIN PIE CRUST
Making a gluten free pie crust takes a little bit of thought. I have made crustless pumpkin pies before, which are delicious, but the crust definitely adds a lot to the flavor and texture.
This crust adds a nice crunchy and crumbly texture to bring out the smoothness of the filling. It is made with healthy ingredients- almond flour, healthy fats, eggs and a little pumpkin pie spice. My favorite thing about this gluten free crust is how easy it is to make…it only takes one bowl and a spoon! So easy!
EASY HEALTHY PUMPKIN PIE NO SUGAR
To sweeten this easy healthy pumpkin pie, you can use coconut sugar or sucanat, honey or pure maple syrup. I think the maple syrup adds the best flavor and brings out the taste of the pumpkin well.
The combination of maple with pumpkin is a classic that is hard to pass up, and I think most people will agree with that!
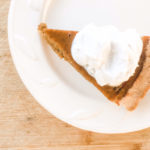
COCONUT MILK WHIPPED CREAM
I discovered a few years ago how easy it is to make a dairy-free whipped cream that adds the perfect touch to your pumpkin pie. It’s so simple to make, and the only ingredient you need is a can of full-fat coconut milk. You can add a touch of money or maple syrup, or bit of vanilla, but that is completely optional.
To make this dairy-free whipped cream, you’ll need to plan ahead a bit and place a can of coconut milk in the refrigerator the night before so that it has plenty of time to get cold.Then simply scrape the cream off the top of the can into a mixing bowl. Whip it with a hand mixer for a minute or two until peaks form.
Then hide the bowl from your kids so they don’t eat it all up before the pie is ready.
EASY HEALTHY PUMPKIN PIE RECIPE
You can use homemade pumpkin puree or canned pumpkin.
I have found that canned pumpkin will make the pie a little denser, and you may want to add in a little coconut milk to thin the pie filling if it is too thick. The filling should be spreadable, but not pourable.
If you are using homemade pumpkin puree, you’ll need 2 cups of pumpkin. Make sure that the liquid is squeezed out so that your pie isn’t too runny.
HOW CAN I MAKE PUMPKIN PIE SPICE AT HOME?
I usually use this brand of pumpkin pie spice, but if you’re all out it’s easy to make your own at home.
The Holidays are upon us and it’s time for pie! This easy Paleo Pumpkin Pie is not only Paleo approved but dairy free, gluten free, sugar free and delicious! Learn how to make this healthy pumpkin pie and you’ll see how simple eating by healthy for the holidays can be!
Prep Time10mins
Cook Time1hr
Total Time1hr10mins
Ingredients
FOR THE CRUST
1cupalmond flour
2 tablespoonscoconut oilmelted
1egg
1teaspoonpumpkin pie spice
1/4 teaspoonsalt
FOR THE FILLING
115 oz canorganic pumpkin or two cups of pumpkin puree
3eggs
1/2cupmaple syrup (adjust according to sweetness preference)
2teaspoonspumpkin pie spice
1teaspooncinnamon
1/2teaspoonsalt
1teaspoonvanilla
FOR THE COCONUT WHIPPED CREAM
canfull fat coconut milk
1teaspoonmaple syrupoptional
1/2teaspoonvanillaoptional
Instructions
FOR THE CRUST
Prepare a 9" pie pan and preheat oven to 375 degrees.
Add ingredients to a mixing bowl and stir until well combined.
Press the crust evenly into the bottoms and up the sides of a pie pan.
Bake for 10 minutes until bottom is set.
Remove from oven while you prepare the filling
FOR THE FILLING
Add ingredients to a large mixing bowl and whisk until combined.
Spread filling into pre-baked crust.
Bake for 55-60 minutes or until pie sets.
FOR THE COCONUT WHIPPED CREAM
Allow a can of full fat coconut milk to chill in the refrigerator for at least 12 hours
.Scrape the hardened cream off the top of the can into a mixing bowl.
Whip with a hand mixer for 1-2 minutes until peaks form.
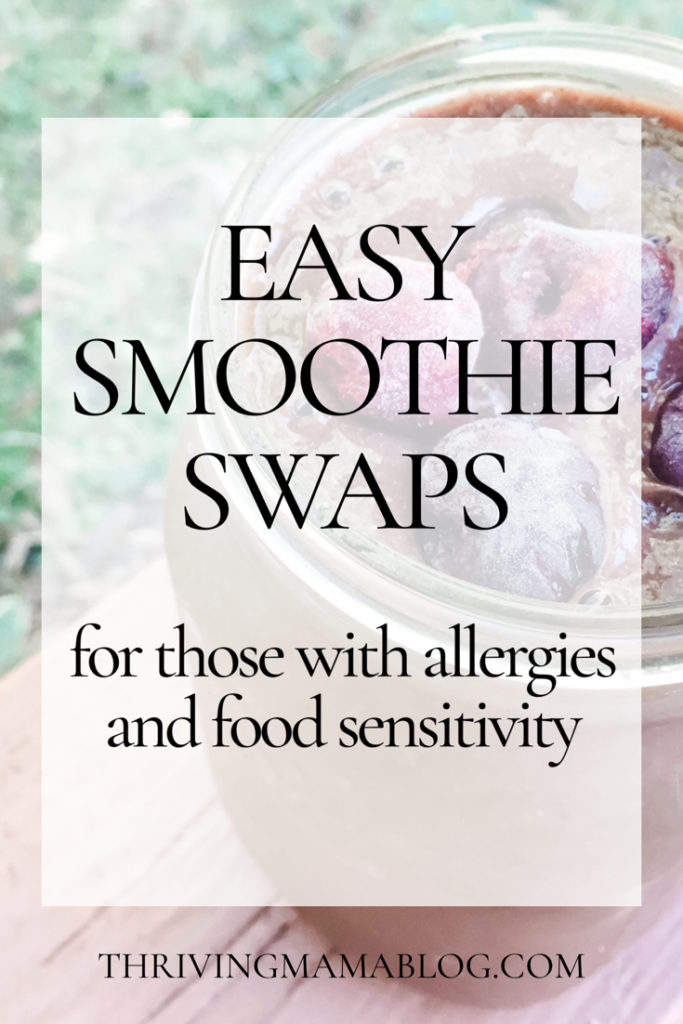
If you have food allergies or sensitivities, or just limited ingredients on hand, you may find yourself wondering “what are some easy smoothie swaps and substitutions I can make?”
Here are some easy swaps for common allergens used in smoothies:
PIN SMOOTHIE INGREDIENT SWAPS AND SUBSTITUTIONS FOR LATER
SWAP THESE SMOOTHIE INGREDIENTS WITH…
Almonds, raw:Other raw nuts of choice such as Brazil nuts, hazelnuts, walnuts, cashews. You can also use a tablespoon or two or raw nut butter.
Almond milk: Oat milk rice milk, coconut milk, hemp milk. Any other plant based milk. In a pinch, use a tablespoon of raw nut butter blended with cup of water.
Apples:Pears, asian pears, other types of apples
Apricots:Nectarines, peaches, mango, plums.
Bananas:Avocado. See the bottom of this post for more ideas!
Beets:Carrots, red cabbage, golden beets
Blackberries:Any berry of choice; Blueberries, cranberries, raspberries, cherries, strawberries
Blueberries:Blackberries, raspberries, cherries, strawberries, other berries of choice,
Broccoli:Cabbage, cauliflower, napa cabbage
Cabbage:Spinach, napa cabbage, bok choy, romaine, chard, watercress
Cantaloupe:Honeydew, musk melon, or any other melon, peaches, papaya
If you have an allergy to bananas (or just don’t like them!) then try some of these great banana substitutions:
Mango (frozen or fresh)
Pineapple. (Frozen or fresh).
Pear.
Chia seeds or flax seeds
Fresh pitted dates.
Nut Butters. (Almond, cashew, tahini, etc.)
Applesauce.
Avocado. (Adds a great creamy texture without the sweetness).
Raisins.
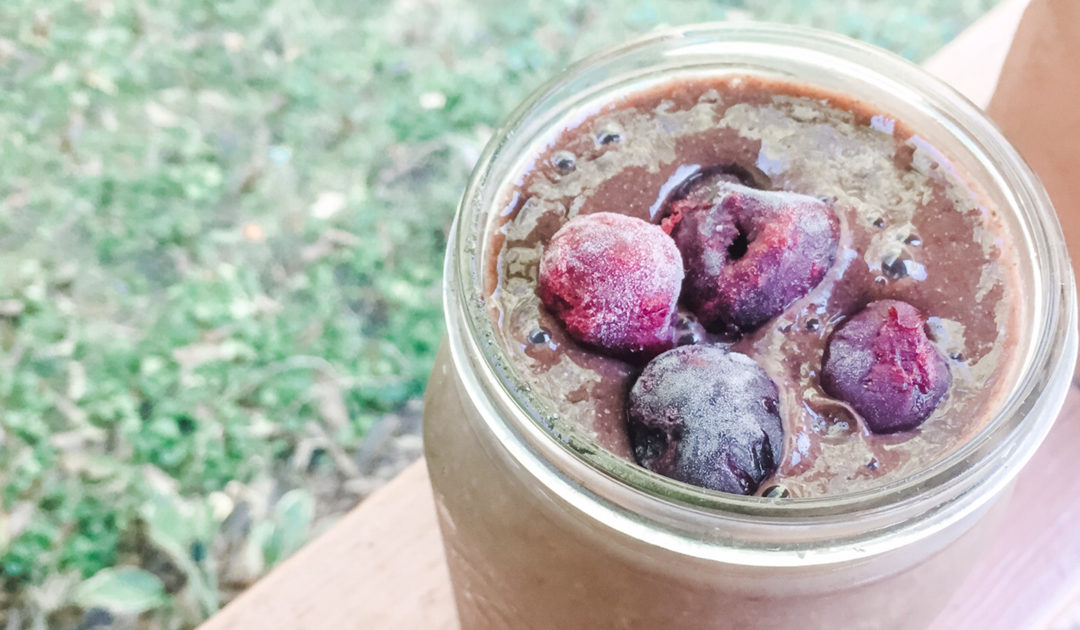
BANANA FREE GREEN SMOOTHIE RECIPE
PEACH COCONUT DREAM-Banana Free
Prep Time: 5 minutes
Total Time: 5 minutes
Serving: 1
DESCRIPTION
If you’re watching your sugar intake, are allergic to bananas or simply don’t like them, this banana free green smoothie recipe is a great substitute. If you are lucky enough to find organic peaches, leave the skin on for added fiber!
INGREDIENTS
2 cups spinach
2 cups coconut water
2 cups grapes*
2 peaches*
INSTRUCTIONS
Blend spinach and coconut water-blend well.
Add remaining ingredients and blend until smooth
NOTES
*Use frozen grapes or peaches for a cool, refreshing smoothie, or throw a few ice cubes in.
*Store in an airtight container in the refrigerator for up to three days.
If you’re watching your sugar intake, are allergic to bananas or simply don’t like them, this banana free green smoothie recipe is a great substitute. If you are lucky enough to find organic peaches, leave the skin on for added fiber!
Prep Time5mins
Total Time5mins
Servings: 1
Ingredients
2cupsfresh spinach
2cupscoconut milk
2cupsgrapes
2peaches
Instructions
Blend spinach and coconut water-blend well.
Add remaining ingredients and blend until smooth
Notes
*Use frozen grapes or peaches for a cool, refreshing smoothie, or throw a few ice cubes in.*Store in an airtight container in the refrigerator for up to three days
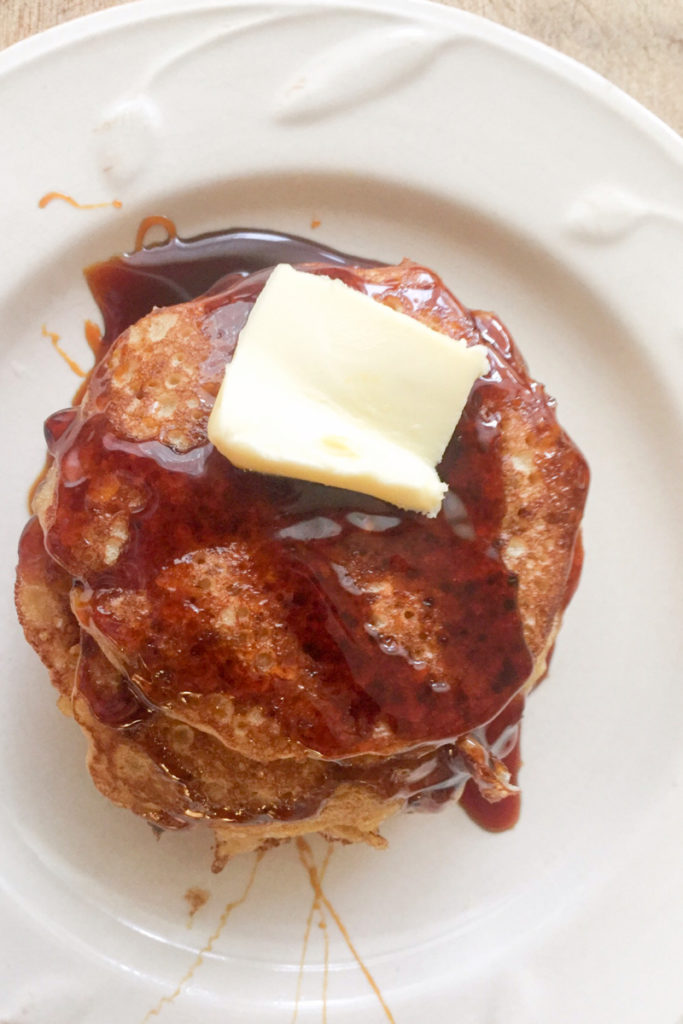
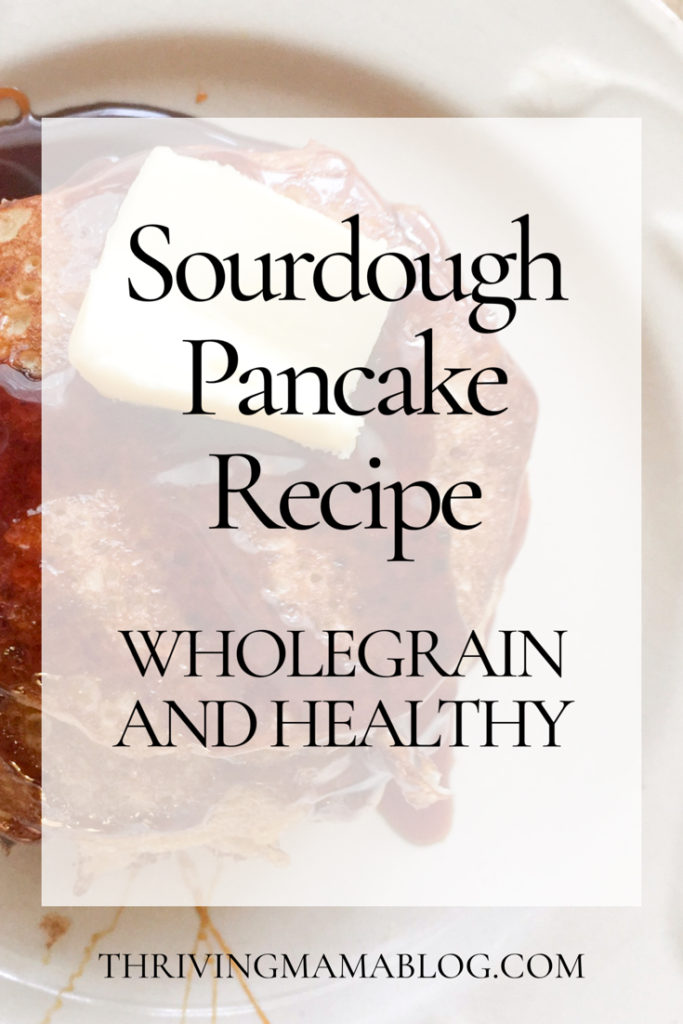
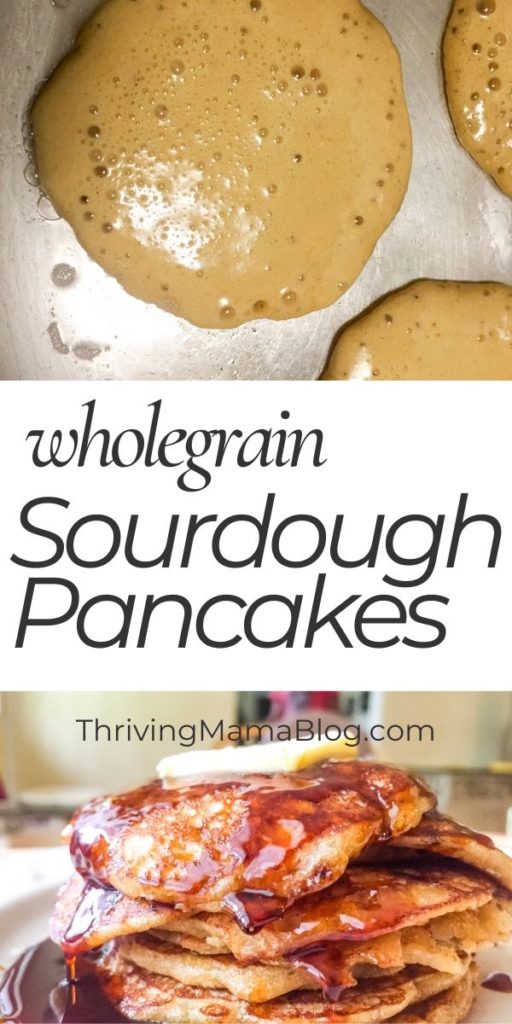
THIS WHOLEGRAIN SORGHUM SOURDOUGH PANCAKE RECIPE IS UNBELIEVABLY DELICIOUS AND SURPRISINGLY SIMPLE TO MAKE WITH JUST A FEW BASIC INGREDIENTS. THROW IN SOME BLUEBERRIES OR CHOCOLATE CHIPS FOR AN EXTRA SPECIAL LAZY SUNDAY TREAT.
My newest obsession is sourdough. I’ve been fiddling with it for a while, and am determined to become a sourdough pro!
WHAT YOU’LL NEED TO MAKE SOURDOUGH PANCAKES
Before we get started, let’s go over some of the most helpful tools you will need when baking sourdough pancakes.
First of all, get this book! This book will literally change your life. You wouldn’t think that a book about bread baking would have the ability to change someone’s life but seriously, this book is really good. Just check it out!
–A magic pancake pan. Well, at least that’s what we call it! You’d be surprised the difference having a pan like this makes
—Einkorn flour.T his flour is my favorite. It’s made from ancient wheat and people with gluten intolerances often do well with it, especially when it’s fermented into sourdough. It’s also available at THRIVE MARKET. You can get 25% off your first order through my link. I love to buy einkorn, almond butter and coconut oil from here. They have quite a few things that are actually quite a bit cheaper than Amazon!
—Sourdough starter. Grab some from a friend or learn to make your own. You can also order a starter kit online like this one.
–Jars to keep your starter in. Wide mouthed mason jars work great, or this type of jar
–Kitchen Scale to feed your starter and weigh your dough. Or, just eyeball it.
—Ceramic bowl.These kind work well for raising the dough in.
—Water filter. This is of course totally optional, but you will want to use a good filtered water or spring water for making your bread. If you’re looking for a good water filter, you can read about the one I have fallen in love with here
I have tried making sourdough bread, English muffins, tortillas, pizza crust and now pancakes. This is the first thing I have made that I feel turned back out so deliciously well that I needed to share it on my blog. Hopefully there will be lots more sourdough recipes coming by soon, however. I just need a little more time to master the craft.
That said, I couldn’t believe how wonderful these pancakes turned out. They were deliciously fermented, fluffy, and crispy around the edges.
The idea for adding sorghum to the batter came because I had SEVEN jars of fresh, delicious, homemade sorghum molasses that my friend Michelle has given me sitting on the kitchen counter staring at me.
Michelle’s family has a big sorghum making party every year, where they do the entire sorghum making process by hand. From growing and cutting the cane to boiling it down and canning, they do it all right there on their farm. I knew it was bound to be delicious.
And I was right.
PIN SORGHUM SOURDOUGH PANCAKE RECIPE FOR LATER
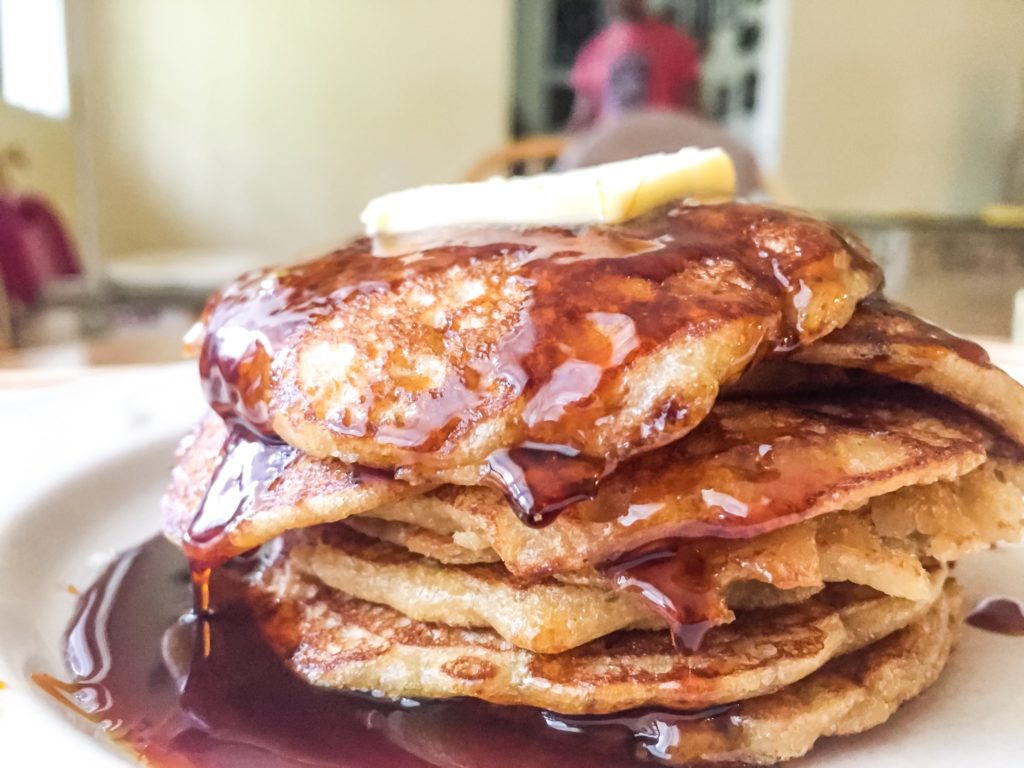
The sorghum added a slightly sweet, rich flavor to the batter that was the perfect counterpart to the sourdough taste. We topped the pancakes with butter and more sorghum, but they would be equally as delicious with the traditional maple syrup.
HOW TO MAKE YOUR OWN HOMEMADE SOURDOUGH STARTER FROM SCRATCH
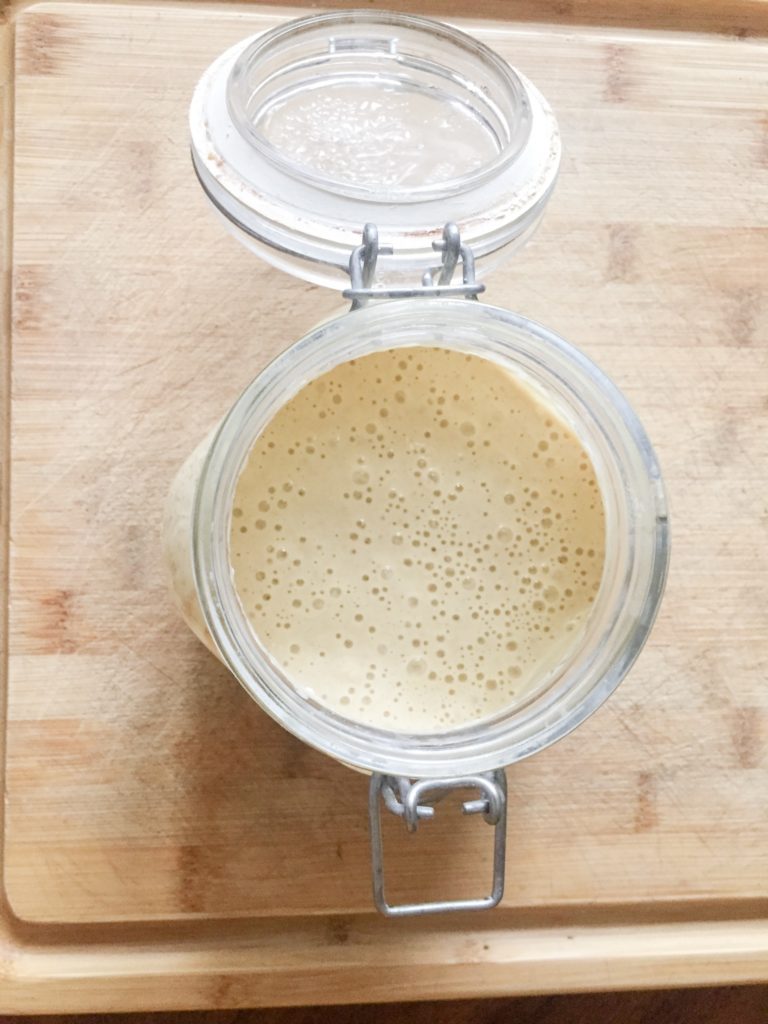
The wonderful thing about this recipe isn’t that, unlike most sourdough recipes, there is no wait time to allow for fermentation. You just need to have a couple cups of fed starter on hand. You can pull your starter directly out of the fridge without even bringing it to room temperature and whip up a batch of pancakes!
Just make sure that you have already fed your starter and allowed it to ferment a bit. If you just stirred in new flourish and water, it will need a little fermenting time.
WHOLE GRAIN SOURDOUGH PANCAKE RECIPE-THE PROCESS
I make all of my sourdough and starters from whole grains. Lately I’ve been using Einkorn Flour, which is often tolerated by those with gluten sensitivities, once it has been fermented for 48 hours. I’ll share more about the health benefits on long fermented EINKORN in a future post. Meanwhile, if you’d like to read up more on what is known as the original wheat, I really recommend this book about Einkorn Flour.
If you have a cast iron skillet, I strongly recommend you use it for these pancakes. Cast iron is perfect for sourdough pancakes.
To make sure the pancakes don’t stick to the pan, follow these two rules:
Preheat the skillet BEFORE adding batter.
Flip the pancake ONLY one time.
This recipe works great for 2 hungry people or 4 not so hungry people. But in full transparency, I usually need to double the batch to get my little crew fed.
First mix the starter, eggs, oil or butter, sorghum and salt in a glass or ceramic bowl. Then add the baking soda, which will make it foam up.
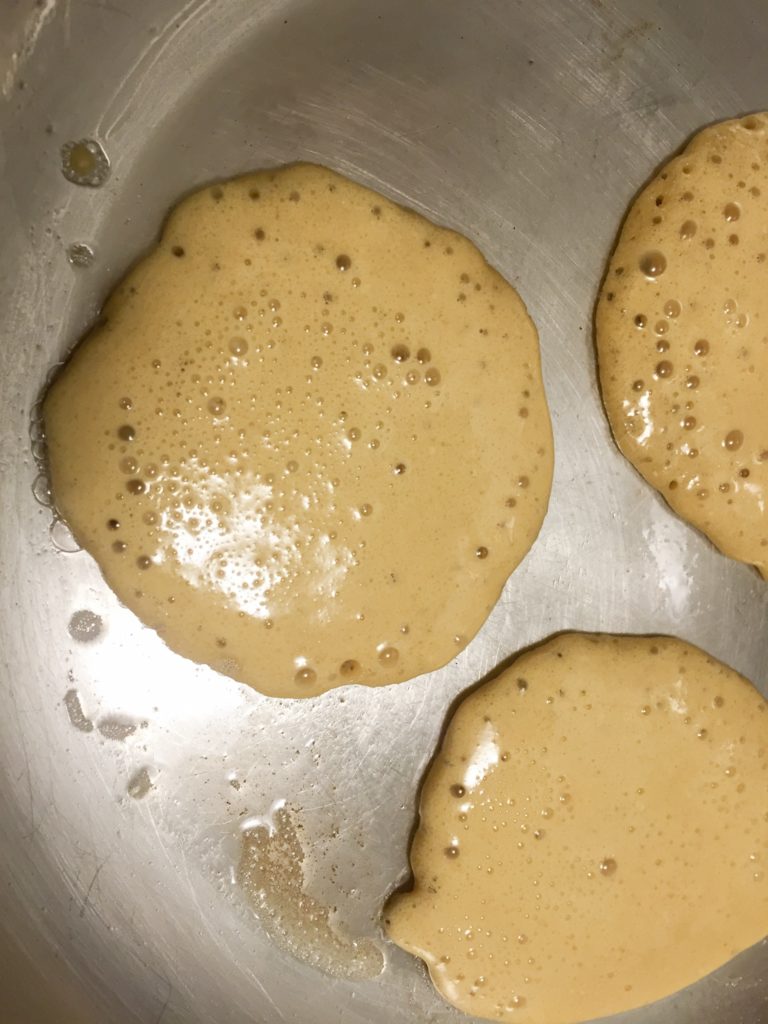
To get that crispy fried edge, first add a tablespoon of butter or oil to the skillet, and let it heat up.
After it sizzles, pour a ladle of batter right into the middle of the pan. Then turn the stove down a little bit so that the pancake cooks through without burning.
After the top is full of bubbles, flip it on over!
Allow it to cook another 30 seconds on the second side.
Repeat. Repeat. Repeat some more!
For a really special treat, sprinkle some blueberries or chocolate chips on each pancake before flipping it over. This works a little better than stirring them into the batter, which tends to make the pancakes stick.
HOW DO YOU MAKE WHOLEGRAIN SOURDOUGH STARTER?
Stay posted! I’m going to do a tutorial on this subject next! Be sure to subscribe so you don’t miss it.
HOW TO FREEZE SOURDOUGH PANCAKES
Next time you have a bunch of left over pancakes (because apparently that does happen to some people..not around here though. They gobble up as many as I can make in one meal!!) be sure to freeze them for a quick and easy meal or snack. Pancakes are GREAT reheated.
Tips for Freezing Pancakes
Make sure the pancakes are fully cooked before freezing.
Label a resealable freezer bag with the type of pancakes and the date you made them. Pancakes will keep well in the freezer for up to two months.
Place a single layer of pancakes on a cookie sheet and put them in the freezer for about 30 minutes before placing the in the freezer bag. Otherwise, they will all stick into one big clump.
Or, if you don’t have room for a cookie sheet in your freezer, place the pancakes between layers of parchment paper before stacking them into the resealable freezer bag.
How to Reheat Pancakes
Microwave
Place 1 to 4 frozen pancakes on a microwave safe plate.
Microwave roughly 20 seconds for one pancake, and about 60 seconds for 4-5 pancakes.
Oven
Preheat the oven to 350ºF.
Place place the pancakes in a single layer on a cookie sheet and cover tightly with foil. E.
Bake for about 10 minutes, or until warm and soft.
Toaster
Pop the pancakes directly into the toaster
Toast until warm
Watch carefully or they will burn!
WHOLE GRAIN SORGHUM SOURDOUGH PANCAKE RECIPE
Our favorite sourdough pancakes recipe is simple to whip up with just a few basic ingredients. Add toppings, like blueberries or chocolate chips to make them an extra special weekend morning treat.
SOURDOUGH PANCAKE INGREDIENTS
2 cups Sourdough Starter, fed
2 eggs
1/4 cup butter or coconut oil, melted
4 tablespoons sorghum
1/2 teaspoon salt
1 teaspoon baking soda
coconut oil or butter for frying
INSTRUCTIONS
To make sure the pancakes don’t stick to the pan, follow these two rules: a) Preheat the skillet BEFORE adding batter. b) Flip the pancake ONLY one time.
In a glass bowl, mix the starter, eggs, coconut oil or butter, sorghum and salt. Add the baking soda last, the batter will begin to foam.
Preheat a tablespoon of butter or coconut oil in the preheated skillet.
When the butter starts to sizzle, pour the batter right into the hot oil or butter. Then turn the stove down a bit so that the pancake is able to cook thoroughly without burning.
Wait until the top is bubbly, then flip it over.
Cook about another 30 seconds on the other side.
Remove pancake from the griddle, and repeat, repeat, repeat!
Top with sorghum and grass fed butter, or 100% pure maple syrup.
Optional: Sprinkle some blueberries or chocolate chips on each pancake before flipping it over. This works a little better than stirring them into the batter, which tends to make the pancakes stick
THIS WHOLEGRAIN SORGHUM SOURDOUGH PANCAKE RECIPE IS UNBELIEVABLY DELICIOUS AND SURPRISINGLY SIMPLE TO MAKE WITH JUST A FEW BASIC INGREDIENTS. THROW IN SOME BLUEBERRIES OR CHOCOLATE CHIPS FOR AN EXTRA SPECIAL LAZY SUNDAY TREAT.
Prep Time5mins
Cook Time20mins
Total Time25mins
Servings: 4
Ingredients
2cupsfed sourdough starter
2eggs
4tbspsorghum
1/4cupmelted coconut oil or butter
1tspbaking soda
1/2tspsea salt
Instructions
In a glass bowl, mix the starter, eggs, coconut oil or butter, sorghum and salt. Add the baking soda last, the batter will begin to foam.
Preheat a tablespoon of butter or coconut oil in the preheated skillet.
When the butter starts to sizzle, pour the batter right into the hot oil or butter. Then turn the stove down a bit so that the pancake is able to cook thoroughly without burning.
Wait until the top is bubbly, then flip it over.
Cook about another 30 seconds on the other side.
Remove pancake from the griddle, and repeat, repeat, repeat!
Notes
To make sure the pancakes don't stick to the pan, follow these two rules: a) Preheat the skillet BEFORE adding batter. b) Flip the pancake ONLY one time.Top with sorghum and grass fed butter, or 100% pure maple syrup.Optional: Sprinkle some blueberries or chocolate chips on each pancake before flipping it over. This works a little better than stirring them into the batter, which tends to make the pancakes stick
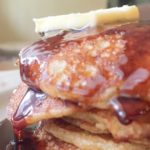
CONCLUSION
I think this picture says it all! These sourdough pancakes were a hit!
Be sure to let me know how you liked these pancakes! Or, if you need help with the recipe or have questions, comment below!
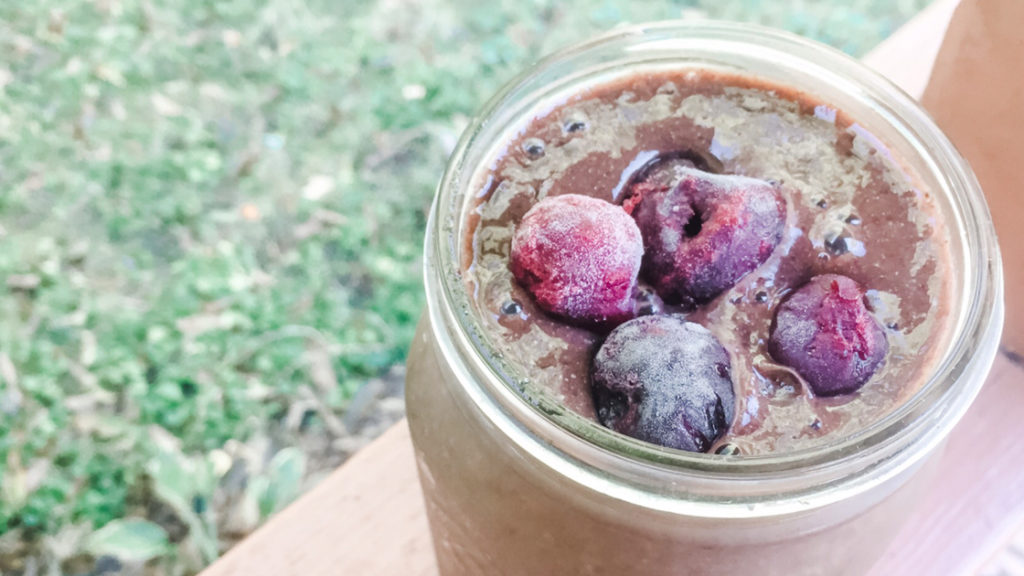
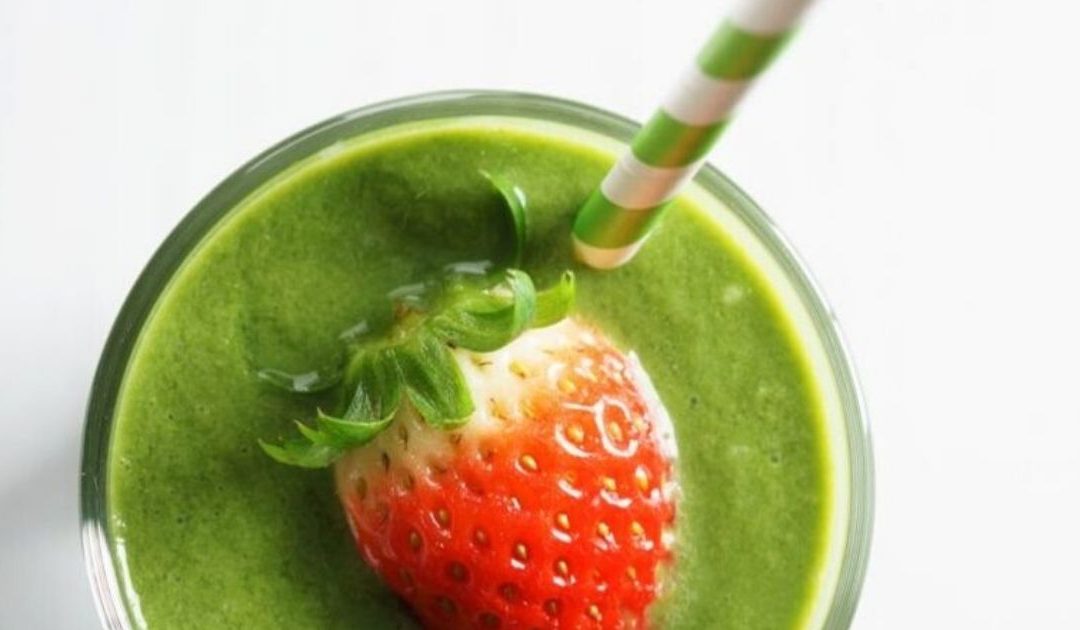
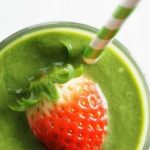
Step aside, morning coffee! This Simple Strawberry Mango Smoothie is sure to knock your socks off! Even if you don’t like green smoothies, or are just generally leery of anything green before 11 a.m., you’ll be hard pressed to resist the perfect flavor combo of sweet strawberries paired with luscious mango. Plus, it’s super healthy!
This healthy strawberry mango smoothie recipe is a crowd pleaser. Simple enough for a child’s palate, yet refined enough for the pickiest of green smoothie critics. It’s cool, creamy, and perfectly delicious. It’s also slightly magical! Start your morning with a glass (or two) of this amazing-ness, and you’ll feel strangely invincible for the rest of the day.
Ok, I realize I may be at risk of over dramatizing the impact that a green smoothie can have on a mama’s psyche, but this strawberry mango smoothie truly makes me feel fantastic every time I drink it. The benefits of green smoothies are seriously far reaching. After a few sips, I start to believe I just may ACTUALLY be #supermom, and can accomplish anything.
My pages long to-do list? Child’s play.
Vacuuming under the beds, finally? No problem!
Unloading the dishwasher? Consider it done!!
(You can jumpstart your #supermom powers by joining our free 7-Day Green Smoothie Challenge here. It’s awesome)
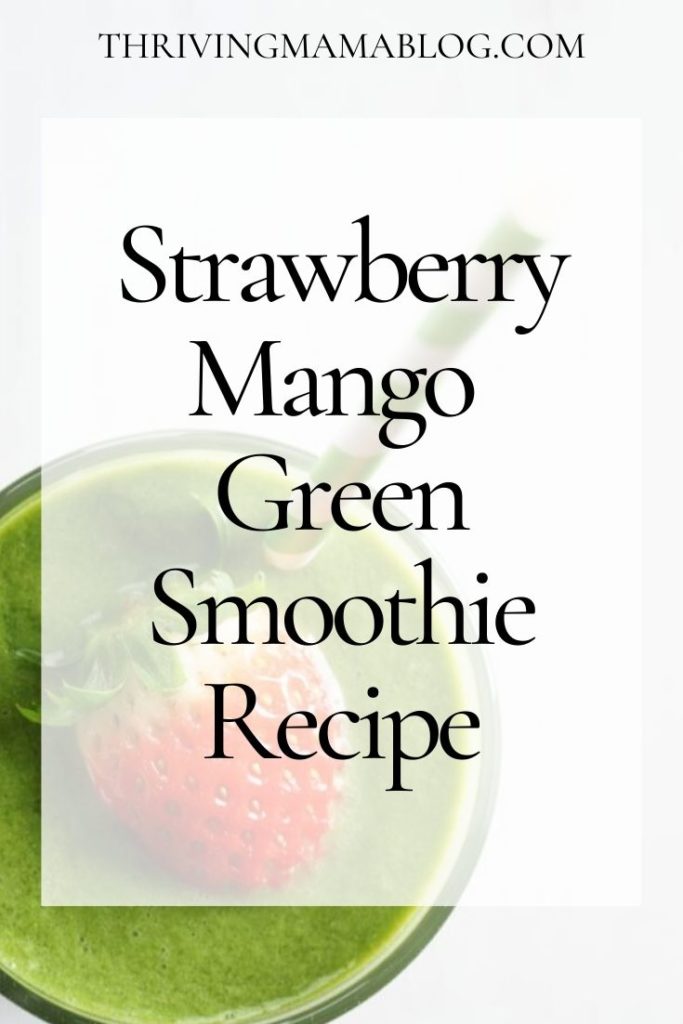
PIN STRAWBERRY MANGO SMOOTHIE RECIPE FOR LATER
This post contains affiliate links, for which we may earn a small commission at no added cost to you. Read our affiliate disclosure here
Packed full of nutrition this healthy green smoothie has a tendency to make me feel like a booty-kickin’ superhero ready to conquare the world. Or, at least that pile of laundry I’ve been ignoring for two weeks. Now, THAT is magic.
So, what is it that makes this smoothie so magical?
STRAWBERRIES HAVE MORE VITAMIN C THAN ORANGES
True story! Strawberries win big in the vitamin C department. And we all know that a diet rich in vitamin C will helps to keep our immune systems at the top of the game. Buh-bye, back-to-school runny noses!
MANGO: A TROPICAL VACATION AT HOME
If you can’t tell, I really, really LOVE mangoes. I could eat them every day and never tire of them.
I’m always a little surprised by how many people haven’t had mango before. I think of mango as like the tropical version of a peach. It’s sweet and juicy, and has LOT’s of vitamin a. I usually end up standing over the sink to eat mine, and just let the juice drip down my chin as I imagine I’m on a tropical island somewhere. A tropical island that does NOT have a sink of dirty dishes on it…
STRAWBERRY MANGO SMOOTHIE= NUTRITION POWERHOUSE
This single smoothie will give you more than half a day’s worth of recommended vitamin D and calcium. It’s also chock full of vitamins A, K and E, potassium, magnesium; and B vitamins.
STRAWBERRY MANGO SMOOTHIE RECIPE
Strawberry and mango go together like Peanut Butter and Jelly! This recipe is so simple and easy to make, yet worthy of making over and over again!
INGREDIENTS
1 cup fresh spinach
1 cup almond milk
1 cup strawberries
½ cup mango
INSTRUCTIONS
1. Place spinach and almond milk or water in blender. Blend until smooth.
2. Add remaining fruit and blend again.
NOTES
Use at least one frozen fruit, or toss in a few ice cubes to make it nice and cool.
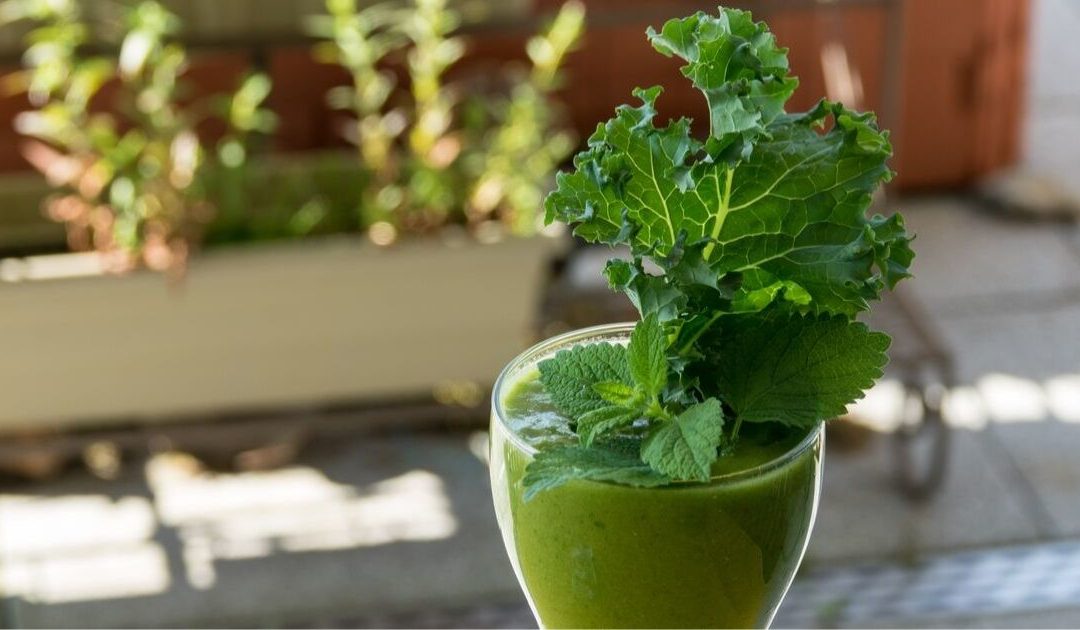
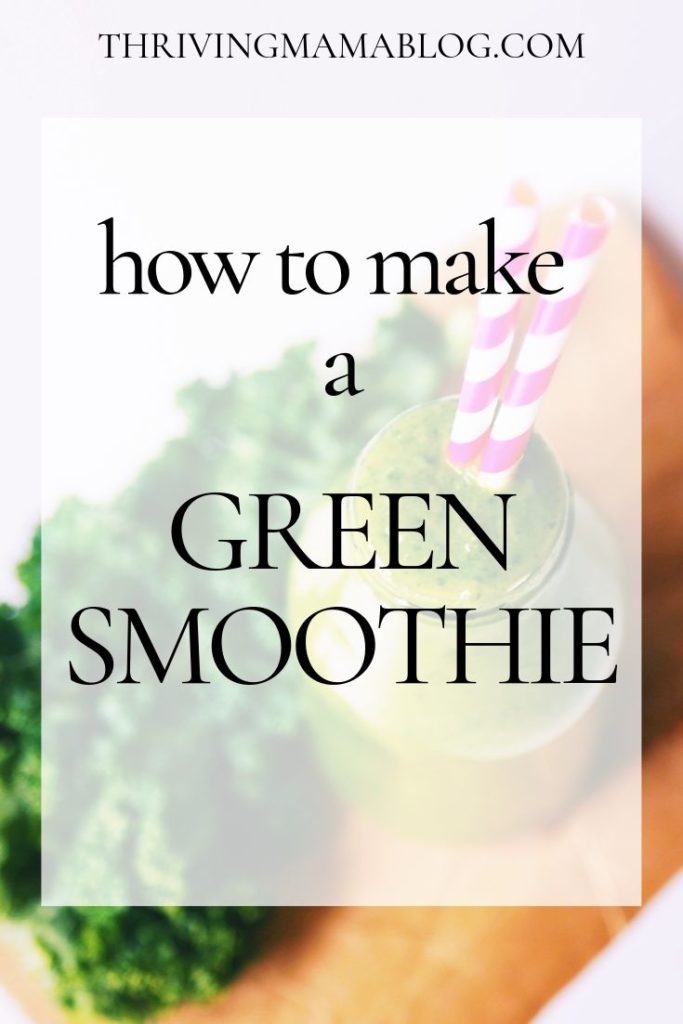
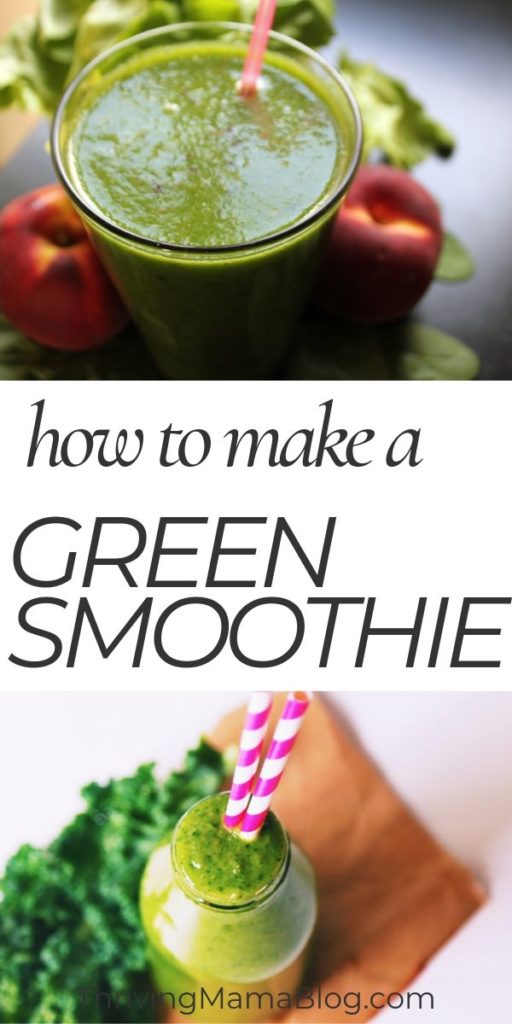
If you’ve been around this blog very long at all, you already know how GREEN SMOOTHIES have changed my life and helped me to lose 67 lbs after the birth of my third baby. In fact, I’ve been drinking daily green smoothies for so long, sometimes I forget that some people don’t know how to make a green smoothie. So let’s go over the basics:
Learning how to make a green smoothie is incredible easy. All you need is a blender, fruit and leafy greens!
FOLLOW THESE SIMPLE TIPS TO GET A GREAT TASTING GREEN SMOOTHIE EVERY TIME:
Blend 1 cup of leafy greens in a blender. Spinach is a good mild green for beginners.
Add 1 C of water and blend until all leafy chunks are gone.
Add fruit. Frozen bananas, berries and mango are good fruits for beginning green smoothie drinkers.
Blend well, until smooth and creamy.
Serve immediately or store in an airtight container in the fridge for up to 2 days.
The wonderful thing about green smoothies is that it is easy to adjust them to incorporate whatever produce is in season (or whatever you happen to have in your kitchen!). The basic ingredients are:
Leafy Greens: Spinach is a staple, because of it’s mild flavor. Kale is also a favorite. Work your way up to the “spicier” greens such as dandilion, arugula and mustard greens (use with caution!).
Base Ingredient: This is something that makes the smoothie a little creamier, and carries the flavors of the other ingredients. I recommend sticking with fruits like banana, mangos and dates, you may choose to sometimes experiment with coconut milk, plant based yogurts or even silken tofu.
Fruit: Almost any fruit works well! Fresh or frozen…just make sure it’s ripe for optimal flavor and nutrition. Some of my family’s favs are apples, pears mango, blueberries, strawberries, peaches, kiwi, pineapple…you get the idea 😉
Optional Super Foods: Things like chia seeds, flax seeds, vegan protein powders, spices and herbs, cacao nibs or cocoa powder…the ideas are endless!
How to Eat Organic on a Budget FREE Ebook
Print off the CLEAN 15 AND DIRTY DOZEN SHOPPING GUIDE so that you always know what to buy from the organic produce section!
You have Successfully Subscribed!
GREEN SMOOTHIE BENEFITS
The benefits of green smoothies are almost too numerous to count! Some of the benefits I have PERSONALLY experienced from drinking daily green smoothies include:
Almost effortless weight loss
Dramatically increased energy
Clearer skin
Better and more frequent…ah-hmm, movements
Lessened inflammation
Quicker recovery times after working out
Improved and more stable moods
More patience with my kids (seriously!)
5 GREEN SMOOTHIE TIPS
1. Know the 60/40 rule for smoothies
Getting the proportions right is key when making green smoothies, especially as a beginner. If it still tastes too “green”, add more sweet fruits. As your tastes adjust over time (which they will!) slowly add in more leafy greens to up the nutrients.
2. Blend the greens first to avoid leafy chunks
No one wants a chunky smoothie! The best way I have found to guarantee a smooth smoothie is to first blend the leafy greens and your liquid base. Then add your fruit and remaining ingredients and blend again.
3. Use frozen fruit instead of ice in your green smoothie
Freezing fruits like ripe, peeled bananas, grapes, pineapple or berries is a great way to have a nice cool smoothie without watering it down with ice. The frozen fruit will also add a creamier texture. You can even freeze your leafy greens in a freezer safe bag. Add them straight to your blender without defrosting!
4. Use natural sweeteners
Adding naturally sweet fruits to any smoothie will help kick that bitter or “too green” taste. Bananas, mangos, pineapple, ripe pears and pitted dates are all wonderful additions and will help you to avoid more processed sweeteners.
5. Prep smoothies ahead of time for the perfect fast food
Life as a mommy can get crazy…especially in the mornings! That’s why I recommend blending your green smoothie the night before and storing it in the fridge (for up to 2 days!) for a grab and go breakfast on those hectic mornings. Use an airtight container and keep it cold as long as possible. Give it a good shake before opening it. We know life can get crazy busy— especially in the morning.
MAKE EXTRA FOR THE KIDS
Kids love fruit smoothies! And smart mommy’s love for their little ones to get their greens. If your littles are on the picky side, start them with something simple, like a banana and strawberry smoothie with just a small handful of a mild green, like spinach. Pro tip: If needed, throw in a few pitted dates for extra sweetness. Over time, you can slowly up the percentage of greens in their smoothies and they won’t even notice!
WHAT ARE THE BEST SUPERFOODS TO PUT IN A GREEN SMOOTHIE?
These are some of my favorites:
Acai
Matcha
Cacao
Hemp
Chia
Flax
Goji Berries
Almonds
Coconut
Pumpkin Seeds
Sunflower Seeds
Tumeric
Vanilla
Cinnamon
Brazil Nuts
Ginger
Tumeric
Ready to start blending?
BEST GREEN SMOOTHIE RECIPE FOR BEGINNERS
Prep Time: 5 min
Total Time: 5 min
Yield: 2 cups
Serving: 1
DESCRIPTION
This Green Smoothie is a great beginner friendly green smoothie recipe, and also kid friendly! It’s full nutrients AND tastes like a tropical party!
INGREDIENTS
1 cup spinach
1 cup water
1 banana
1/2 cup mango
1/2 cup pineapple
INSTRUCTIONS
Add one cup of TIGHTLY packed spinach to blender. Add water. Blend it together until no chunks remain and it looks like green water.
Add the fruit. I like to use frozen bananas for a creamy and cold smoothie.
Blend well, until smooth and creamy. Anywhere from 30 seconds to 2 minutes, depending on your blender
Serve immediately, store the smoothie in the fridge in an air tight container for up to 2 days.
NOTES
*Avoiding bananas? You can use 1/4 avocado or add another 1/2 cup mango as replacement.
Get my latest blog post, video tutorials, natural remedies, and healthy recipes delivered to your inbox.
You have Successfully Subscribed!
Welcome! I’m Gessell. Follow along for all things natural living, essential oil education, motherhood and healthy recipes.
Follow Us
Search the Blog
This is a doTERRA Certified Website
This website uses cookies to improve your experience. We'll assume you're ok with this, but you can opt-out if you wish. Cookie settingsACCEPT
Privacy & Cookies Policy
Privacy Overview
This website uses cookies to improve your experience while you navigate through the website. Out of these cookies, the cookies that are categorized as necessary are stored on your browser as they are essential for the working of basic functionalities of the website. We also use third-party cookies that help us analyze and understand how you use this website. These cookies will be stored in your browser only with your consent. You also have the option to opt-out of these cookies. But opting out of some of these cookies may have an effect on your browsing experience.
Necessary cookies are absolutely essential for the website to function properly. This category only includes cookies that ensures basic functionalities and security features of the website. These cookies do not store any personal information.
Any cookies that may not be particularly necessary for the website to function and is used specifically to collect user personal data via analytics, ads, other embedded contents are termed as non-necessary cookies. It is mandatory to procure user consent prior to running these cookies on your website.
Join the Community and Get the Password for Instant Access to All of My Free Resources
Yay! You did it! Now check your email for your password to access the free stuff